API RP 934-C pdf download
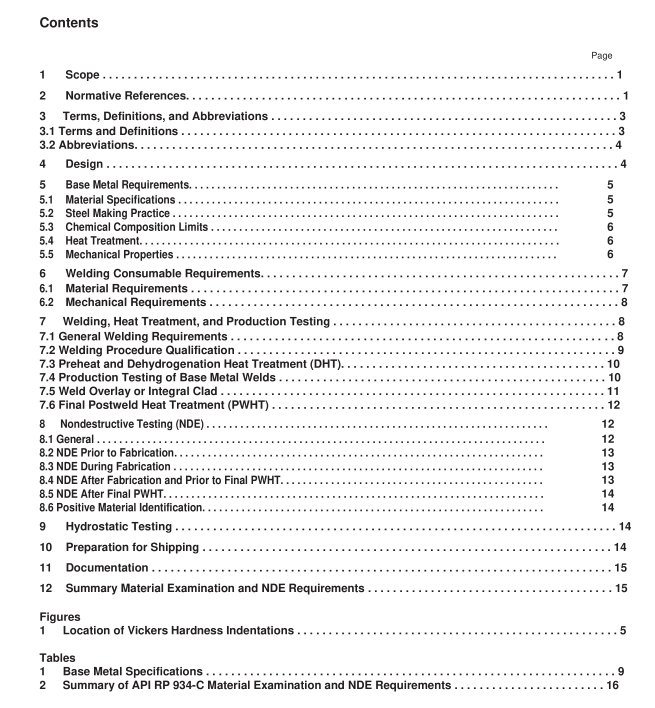
API RP 934-C pdf download Materials and Fabrication of 1 1 / 4 Cr- 1 / 2 Mo Steel Heavy Wall Pressure Vessels for High-pressure Hydrogen Service Operating at or Below 825 °F (440 °C)
Specimens shall be oriented transverse to the rolling direction in accordance with SA-20. Distance from plateedges shall be 1T minimum. lf a hot tensile test is specified by the purchaser (it is not required by this RP), 1/2Tspecimens should be used.
b) Forging一-from each heat, at the t/2T of the prolongation or of a separate test block (sample location from side
edges shall be per Code). Specimens shall be oriented transverse to the major working direction. A separate testblock, if used, shall meet Code and shall be made from the same heat and should receive substantially the samereduction and type of hot working as the production forgings that it represents and should be of the same nominalthickness as the production forgings. The separate test forging shall be heat treated in the same furnace chargeand under the same conditions as the production forgings.
c) Pipe-from each heat and lot of pipe, at t/2T. Specimens shall be oriented transverse to the major working directionini accordance with ASME SA-530.
5.5.2 Tensile Test Requirements
Tensile testing of plates and forging materials shall comply with the applicable code(s) and the followingadditional requirements:
a) test coupon shall be heat treated to represent the maximum postweld heat treatment as specified in 3.1.6;
b) tensile properties at room temperature shall meet the requirements of the applicable code(s).
5.5.3 lmpact Testing Requirements
Charpy V-notch (CVN) impact testing shall be performed for all 11/4Cr-1/2Mo steel material (by heat) used forpressure-retaining components except bolting.CVN impact tests shall comply with the applicable code(s) and thefollowing additional requirements.
a) Test coupons from forgings shall be oriented transverse to the major direction of metal flow.
b) Test coupons heat treated to represent both the maximum and minimum post weld heat treatments that the
equipment are expected to receive during fabrication per 3.1.6 and 3.1.7 shall be tested and meet the followingrequirements. The minimum CVN impact values at 0 °F(-18 C) shall be 40 ft-lbs (54 Joules) average of
three specimens and 20 f-bs (27 Joules) minimum for a single specimen. In addition , if the MDMT is less than0 °F (-18 C),ASME Code requirements for impact testing must also be met. if the impact tests at this MDMT ofless than 0 °F(-18 °C) meet the 40/20 ft-lbs (54/27 Joules) criteria, retesting at 0 °F(-18 C) is not needed.
6 Welding Consumable Requirements
6.1 Material Requirements
6.1.1The deposited weld metal, from each lot or batch of welding electrodes and each heat of filler wires, and eachcombination of filler wire and flux, shall match the nominal chemical composition of the base metal (i.e. the chemicalrequirements of the ASME material specification) to be welded.
6.1.2The chemical composition shall also meet the following limits to improve resistance to embritlement. Theselimits apply to the heat analysis.
X-bar = (10P + 5Sb + 4Sn + As)/100 ≤ 15 ppm.
where:
P, Sb, Sn, and As are in ppm.
—Cis 0.15 wt % max;
-Cu is 0.20 wt % max; and—Ni is 0.30 wt % max.
6.1.3 Welding electrodes and fluxes shall produce low hydrogen weld deposits with a maximum of 0.27 fl oz(8 ml)of diffusible hydrogen for every 3.5 oz (100 g) of weld metal, per AWS A4.3.(These acceptable consumables areoften designated with suffixes of H4 or H8). They shall be baked, stored, and used in accordance with the
consumable manufacturer’s instructions (holding in electrode oven, length of time out of oven, etc.).
6.2 Mechanical Requirements
6.2.1 Tensile Properties
The tensile properties of the deposited weld metal shall meet those of the base metal in accordance with 5.5.2.6.2.2 lmpact Properties
Prior to the start of fabrication, each lot of electrodes, heat of filler wire, and combination of batch of fux and heat ofwire, shall be impact tested and shall meet the requirements of 5.5.3.
7 Welding, Heat Treatment, and Production Testing7.1 General Welding Requirements
7.1.1 Base metal surfaces prior to welding or applying weld overlay shall consist of clean metal, prepared bymachining, grinding, or blast cleaning.
7.1.2 Welded joints, including non-pressure attachments to the vessel body shall:
a) be full penetration joints. With approval by purchaser, this can be waived for external attachment welds, but anypockets which are formed shall be vented;
b) be located so that full ultrasonic examination of welds can be made after fabrication and after the equipment has
been in-service. In cases where this is not practical, the manufacturer should propose alternate NDE methods toverify weld quality for the purchaser’s approval;
c) be made sufficiently smooth to facilitate NDE(MT,PT,UT,or RT), as applicable.
7.1.3 All welding shall be completed prior to final PWHT except welding of attachments to the internal corrosion
resistant weld overlay or cladding, or to external stainless steel weld buildups, when permitted by the purchaser.Forthese attachment welds, a PQR or mockup test, or both, shall be performed to verify that this does not produce a HAZin the base metal, unless waived by the purchaser.
7.1.4 Weld repairs to base metal, weld joints, and weld overlay shall be performed using a repair welding procedurequalified in accordance with 7.2 and shall meet all the same requirements as the normal fabrication welds.
