AS NZS 2205.3.1 pdf download – Destructive tests on welds in metallic materials Method 3.1: Bend tests
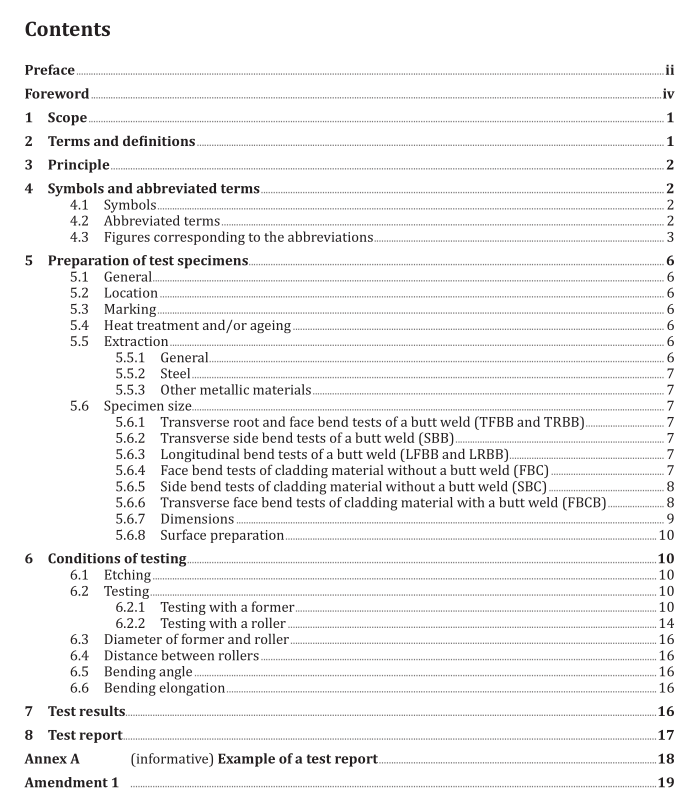
AS NZS 2205.3.1 pdf download – Destructive tests on welds in metallic materials Method 3.1: Bend tests
5 Preparation of test specimens
5.1 General Specimens shall be prepared in such a manner that the preparation does not affect either the base material or the weld metal.
5.2 Location For transverse bend testing of butt welds, the test specimen shall be taken transversely from the welded joint of the manufactured product or from the welded test piece in such a way that after machining the weld axis will remain in the centre of the test specimen or at a suitable position for testing. For longitudinal bend testing of butt welds, the test specimen shall be taken longitudinally from the welded joint of the manufactured product or from the welded test piece. The location and orientation of bend test specimens of cladding material shall be specified by the application standard or by agreement between the contracting parties.
5.3 Marking Each test piece shall be marked to identify its exact location in the manufactured product or in the joint from which it has been removed. If required by the relevant application standard, the direction of working (e.g. rolling or extrusion) shall be marked. Each test specimen shall be marked to identify its exact location in the test piece from which it has been removed.
5.4 Heat treatment and/or ageing No heat treatment shall be applied to the welded joint or to the test specimen unless it is specified or permitted by the relevant application standard dealing with the welded joint to be tested. Details of any heat treatment shall be recorded in the test report. If natural ageing of aluminium alloys takes place, the time between welding and testing shall be recorded.
5.5 Extraction
5.5.1 General The mechanical or thermal processes used to extract the test specimen shall not change the properties of the test specimen in any way. It is permissible to mechanically remove any material that is affected by thermal cutting provided the finished dimensions of the specimens required by this International Standard are met.
5.5.2 Steel Shearing shall not be used for thicknesses > 8 mm. If thermal cutting or other cutting methods which could affect the cut surfaces are used to extract the test specimen from the welded plate, or from the test piece, the cuts shall be made at a distance ≥ 3 mm from the test specimen but in any case sufficient (depending on the process used) not to introduce metallurgical effects which could affect the test results.
5.5.3 Other metallic materials Sheared or thermal cut surfaces are not permitted on bend specimens; only machining (e.g. sawing, grinding or milling) shall be used.
5.6 Specimen size
5.6.1 Transverse root and face bend tests of a butt weld (TFBB and TRBB) See Figures 1, 2 and 9. For transverse root and face bend tests, the test specimen thickness, t s , shall be equal to the thickness of the base material adjacent to the welded joint up to a maximum thickness of 30 mm. If the test piece thickness, t, is greater than 10 mm, the test specimen thickness, t s , may be machined or otherwise mechanically finished from one side to a thickness equal to (10 ± 0,5) mm as indicated in Figures 1 and 2. The face or root of the weld shall be in tension when the specimen is bent. When a relevant application standard requires testing of a full thickness > 10 mm, several test specimens may be taken in order to cover the full thickness of the joint as indicated in Figure 9. In such cases, the location of the test specimen in the welded joint thickness shall be identified.
5.6.2 Transverse side bend tests of a butt weld (SBB) See Figures 3 and 10. For side bend tests, the test specimen width, b, shall be equal to the thickness of the base material of the welded joint. The specimen shall have a thickness, t s , of at least (10 ± 0,5) mm, unless otherwise specified in the relevant application standard. When the joint thickness exceeds 40 mm, it is permissible to split the specimen in the plane of the test piece thickness as shown in Figure 10. In these cases the location of the test specimen in the welded joint thickness shall be identified.
5.6.3 Longitudinal bend tests of a butt weld (LFBB and LRBB) See Figure 4. For longitudinal bend tests, the test specimen thickness, t s , shall be equal to the thickness of the base material near the welded joint, but should not exceed 10 mm. If the test piece thickness, t, is greater than 10 mm, the test specimen thickness, t s , may be machined or otherwise mechanically finished from one side to a thickness equal to (10 ± 0,5) mm as indicated in Figure 4. The face or root of the weld shall be in tension when the specimen is bent.
