IEC 62899-302-3 pdf – Printed electronics – Part 302-3: Equipment – Inkjet – Imaging-based measurement of drop direction
IEC 62899-302-3 pdf – Printed electronics – Part 302-3: Equipment – Inkjet – Imaging-based measurement of drop direction
1 Scope
This part of lEC 62899 specifies in-flight imaging methods for the measurement of thedirection of ink drops jetted from inkiet print-heads using drop watchers. It does not apply toholographic or other interference techniques, or to any method assessing deposited ink drops.
lt is specific to drop-on-demand type inkjet print-heads(used in printed electronicsequipment).
2Normative references
The following documents are referred to in the text in such a way that some or all of theircontent constitutes requirements of this document. For dated references,only the editioncited applies.For undated references, the latest edition of the referenced document(inciluding
any amendments) applies.
IEC 62899-302-1,Printed electronics -Equipment – Inkjet – lmaging based measurement ofjetting speed
Terms and definitions
For the purposes of this document, the terms and definitions given in lEC 62899-302-1 andthe following apply.
IsO and lIEC maintain terminological databases for use in standardization at the followingaddresses:
.IEC Electropedia: available at http://www.electropedia.orgl
.IsO Online browsing platform: available at http://www.iso.org/obp
3.1
inkjet nozzle plane
flat outer surface of the inkjet print-head nozzle plate
Note 1 to entry: The inkijet nozzle plane is defined for a drop-on-demand multi-nozzle print-head,or as otherwisespecfed by the print-head manufacturer or inkiet equipment integrator and stated in the measurement results.
3.2
nozzle row direction
line in the inkjet nozzle plane passing through a row of nozzle exit centres
Note 1 to entry.Typically along the length of the inkiet nozzle plane,or as othenwise specified by the print-headmanufacturer or inkiet equipment integrator and statedin the measurement results.
3.3
reference directionn
Note 1 to entry: Or as otherwise specified by the print-head manufacturer or inkjet equipmentintegrator andstated in the measurement results.
3.4
measurement region
3-D space closest to the inkjet nozzle plane used for imaging of the jetted drops
3.5
drop trajectory
direction of drop travel in 3-D in the measurement region
Note 1 to entry: lt can be measured with two drop watchers mounted with a wide angle between themsimultaneously imaging jetted drops.
3.6
trajectory angles,pl.
two orthogonal angles necessary to define the drop trajectory
Note 1 to entry.: The polar angle is relative to the reference direction: the azimuthal angle is relative to a specficdirection within the nozzle plane,often assumed to be the nozzle row direction.
3.7
projected angle
angle of the drop trajectory in the 2-D image plane of a single drop watcher
Note 1 to entry: The projected angle does not correspond to the polar angle of the drop trajectory unless thea
3.8
reference speed
speed of the drop along the reference direction
3.9
projected speed
speed of the drop along the projected angle
3.10
absolute speed
speed of the drop along the drop trajectory
4Measurement methods
4.1General
The jetted drop direction shall be determined by using one of the following methods,unlessthere is an agreement between the user and the supplier. In that case the method is fullyreported with the measurement results.
Allequipmentengaged in the trajectory measurementshal have a carefully calibratedgeometry.
The image plane shall be aligned in a precisely orthogonal direction to the inkjet nozzle planebefore the start of the measurement.
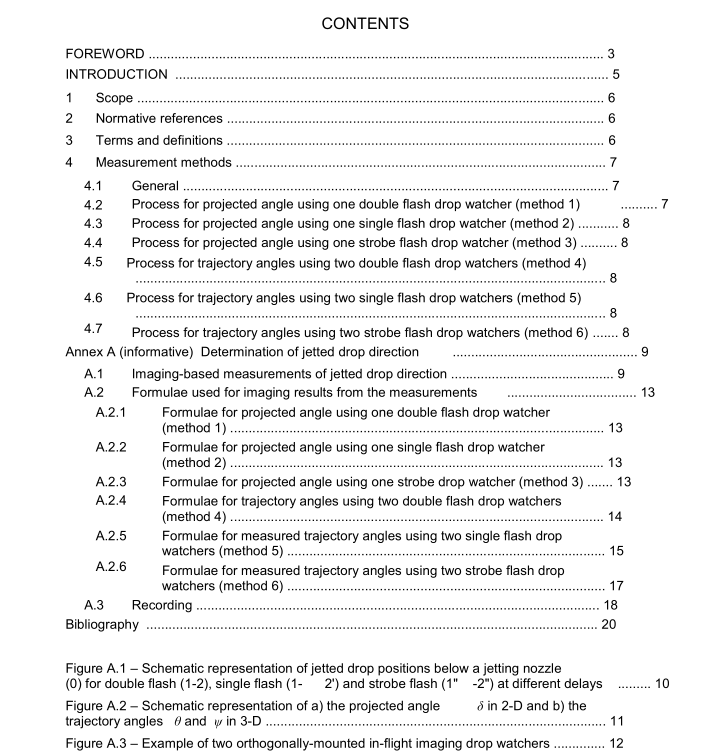
4.2Process for projected angle using one double flash drop watcher(method 1)1) Establish reliable jetting from the nozzle under study in the image measurement region.
2) Record the images and analyse the drop image position changes for the chosen double flash delay.
3) Report the projected angle, using the formula provided in A.2.1.
4) Report the conditions as indicated in Clause A.3.
4.3 Process for projected angle using one single flash drop watcher (method 2)1) Establish reliable jetting from the nozzle under study in the image measurement region.2) Record a single flash image of a jetted drop and of the nozzle under study and analyse the
drop and nozzle exit image positions. Alternatively,record two single flash images of twoseparate drops jetted at different times from the nozzle under study,and analyse thesingle flash drop image positions.
3) Report the projected angle,using the appropriate formula specified in A.2.2.4)Report the conditions as indicated in Clause A.3.
4.4Process for projected angle using one strobe flash drop watcher (method 3)1) Establish reliable jetting from the nozzle under study in the image measurement region.
2)Record a strobe flash image,at a chosen flash delay time,of the nozzle under studyandthe superposed drops, and analyse the image positions of the nozzle exit centre and thesuperposed drops. Alternatively,record two strobe flash images, at two different delaytimes,of two separate drops from the same nozzle,and analyse the change of the singleflash image positions.
3) Report the projected angle, using the appropriate formula specified in A.2.3.4)Report the conditions as indicated in Clause A.3.
4.5Process for trajectory angles using two double flash drop watchers (method 4)
1) Establish reliable jetting from the nozzle under study in the image measurement region,
with the image planes of the two double flash drop watchers having a wide angle between
them aligned with a common axis along the reference direction.
2) Record double flash images of the same drop in each drop watcher for the chosen double
flash delay times and analyse the drop image positions in each double flash drop watcher.3) Report the trajectory angles, using the appropriate formula specified in A.2.4.
4) Report the conditions as indicated in Clause A.3.
4.6 Process for trajectory angles using two single flash drop watchers (method 5)
1) Establish reliable jetting from the nozzle under study in the image measurement region,with the image planes of the two single flash drop watchershaving a wide angle between
them aligned with a common axis along the reference direction.
2) Record single flash images of the same drop and nozzle exit at a chosen delay time in
each drop watcher and analyse the image positions of the drop and nozzle exit centre ineach single flash drop watcher. Alternatively,record images,at chosen delay times ineach single flash drop watcher, of separate drops jetted from the nozzle under study, and
analyse the single flash drop image positions in each drop watcher.
